Hey there y'all!
Since I am in a tailoring class, we talk not only about how to make high quality garments, but also little tips and tricks to take your garment from craft project to custom tailored. Little tricks to take it to the next level. This is something that we talked about: covered snaps. You know like on the inside of a purse, you have those snaps to close it? Well, in a nice blouse or a jacket with those kind of closures, sometimes you can cover them with matching lightweight fabric. Just for "funzies", there isn't really a structural purpose for them- they just look cool :) They
give more continuity to a garment, by keeping everything the same color. Sometimes the bright silver or gold of a typical store-bought closure throws off the visual sleekness of a garment. So this is a good way to keep everything flowing. This technique also makes the closure look almost invisible... because again, sometimes one doesn't want a big tacky silver blotch on a nice garment. So, next time you are shopping for a jacket, check and see if the snaps are covered! If not, shame on them! Just kidding lol.
Something funny we talked about in class pertaining to snaps was: snaps actually have male and female end. Bet you didn't know that! I hadn't either lol, but I suppose if I had sat and thought about it, it makes anatomical sense. Just look at my pictures below of the blue fabric ones and the white fabric ones. The concave one is obviously the female one, and the convex side is male, as you can see. Lol! There was lots of laughter in my class during this discussion lol.
Anyway... back to my original topic lol. How do you do a covered snap? Well, I'll give you the quick answer. Cut a circle in your lining fabric a little bit bigger than your snap, you don't want to see your stitches on the back side. Run a basting stitch around the circle, close to the outer edge. Only knot one end. After doing the quick basting, put the male end in the middle and pull it taught, making kind of a little "bag". Now, on the front side of the male end, move the threads around the "nub", so that the "nub" easily fits into the other side of the snap. I call it a "nub" because I like the word "nub" better than what we had in our instructions, which was "protuberance". That word is of cool too though. But for any who know me, they know I enjoy the word "nub" :) Now, stitch the back end down some so that the edges of your circle of lining can lie flat, and stitch the snap onto your garment! Do the same thing with the female end too. And you're done! See, they're simple :)
 |
| As you can see, they have done the quick basting stitch around the male end, only knotted one end, and moved the threads around the "nub" |
 |
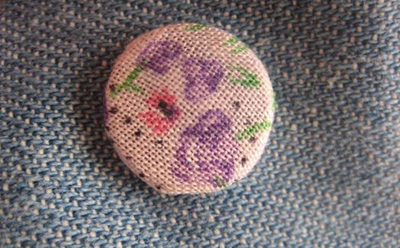
| Covered snap example female end (not used) |
 |
| Covered snap example female end (used- you can see the threads are pushed in, signifying that it has been snapped a few times) |
 |
| Beautiful covered snaps! You can barely see them |
 |
| Here's a nice finished set |
 |
| These are kind of small (sorry) but the female ends are on her left side- as she wears the jacket- and the male ends are behind the big buttons on her right side. Looks nice, no? |
I hope this has inspired you to put covered snaps on EVERYTHING :) Or maybe just to recognize quality when you go shopping :) I know I might have to put some in a couple of purses I own. And just because I like doing different things, I might just cover them with a contrasting color... just for fun!
Until next time- vivre la mode, tout le monde!


No comments:
Post a Comment