Hello everybody!
So now that I am blogging for two classes, I'll get to talk to you guys about not only the fashion world from a clothing/ fit standpoint, but from a drawing/ 2D standpoint as well. Maybe you guys will get as interested in this as I am! As you probably guessed, I'm totally excited to be in a class in which we get to talk about fashion AND draw it too. My head is kind of exploding with happiness lol. But enough about me, I'm going to give you the quick nitty gritty for all you up-and-coming-fashion-sketchers, or maybe those who want to draw the human figure a little more realistically.
So the biggest thing in art and fashion both is proportion. You know the key to buying real estate is location, location, location? Well the key to fashion sketching is proportion, proportion, proportion. Lol. If your croquis, or flat fashion sketch, is way bigger on one side than the other, it will definitely confuse the viewer, and your idea- no matter how cool it might look, if the girl isn't proportionate, it won't be conveyed. Notice the picture on the left- imagine if your croquis was drawn like this! Ahh! You can't tell where her waist is, because it looks like her entire torso is her waist; and that's just not how women are built lol. Her neck is... creepily elongated, nobody's thighs and arms are that small, and her head looks huge. It's super creepy, because it is so disproportionate!
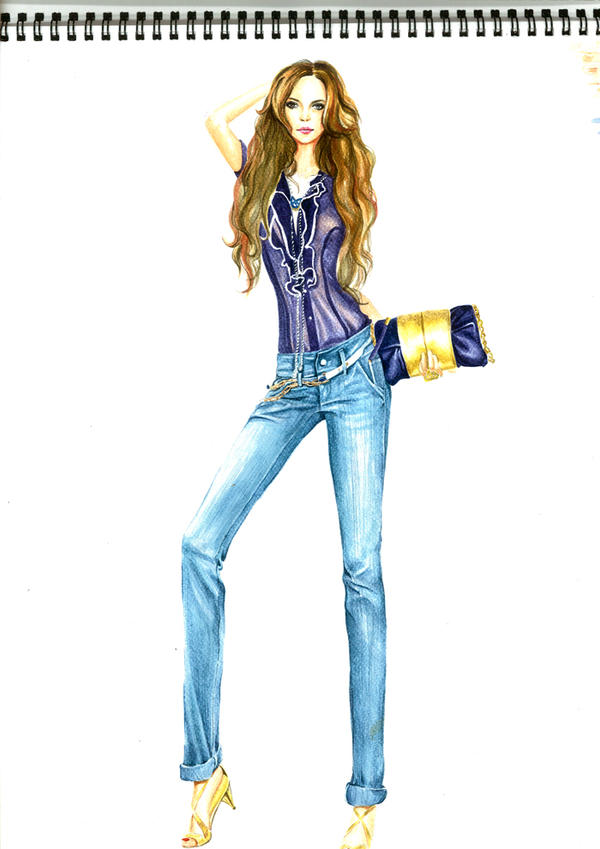
Now looking at the good example on the right, see how their waists are defined at one point only, and their hips are in line with their bust and the shoulders look the correct size in relation to everything else. And the neck is a normal length lol.
So the way we talked about keeping everything looking proportionally correct in class is by using a standard measure in which we can relate to every part of the body. Similar to inches, we use "heads". I'll explain that in a second. And so how we start, is we draw a line vertically down our paper, and then draw a normal oval for the head. It should be around an inch tall. And then draw 9 horizontal lines every inch down from the top of that vertical line and number them from 0 to 8. These lines will keep your sketch in proportion. Just remember what every line stands for:
 |
| Good |
 |
| Bad |
0- top of head
1- bottom of head (the space between these two measurements is how the industry came up with "heads" as a measurement)
2- middle of bust
3- waist
4- where the thigh and pelvis connect
5- middle of thigh
6- knees
7- middle of shins
8- ankles
8.5- where your feet should end generally
 |
| I hope y'all see what I mean by "heads" now. They literally took the size of a head and measured it against every part of the body. And they did the numbering a little differently than I did, but I figured just a general representation would help those visual learners out there :) This is actually kind of an awesome picture. |
If you stay in the ballpark of these numbers, your body should come out looking pretty proportionate. And just as a general rule of thumb, whatever you do to the left side, you do to the right side. That pretty much ensures a good sketch. Granted you probably want to use a ruler first to make sure everything is symmetrical, but once you get going you can do without it.
So I hope these general guidelines help y'all just starting out! For any who enjoy drawing but are a little wary of the human figure, these tips will help you too hopefully!
As always, vivre la mode tout le monde!
No comments:
Post a Comment